
Iron Blight Apartments Puzzle: 2-1-3-1
Solve the Iron Blight apartments puzzle with dial settings 2-1-3-1, find the A96 connector key and B95 windowsill key, and follow the route toward the factory.
Sources and verification
On this page+
Fit the Circuit Board, then set the four Iron Blight apartments dials, from left to right, to 2-1-3-1: centre/up, left, right, left. Check that the elevator works before searching A.96 for the connector key. Cross to Block B for the second windowsill key, then return toward the factory. The panel, connector door and workshop key are three separate progression checks.
- 2
- 1
- 3
- 1
One number per dial: centre/up, left, right, left. Set all four controls to these final positions.
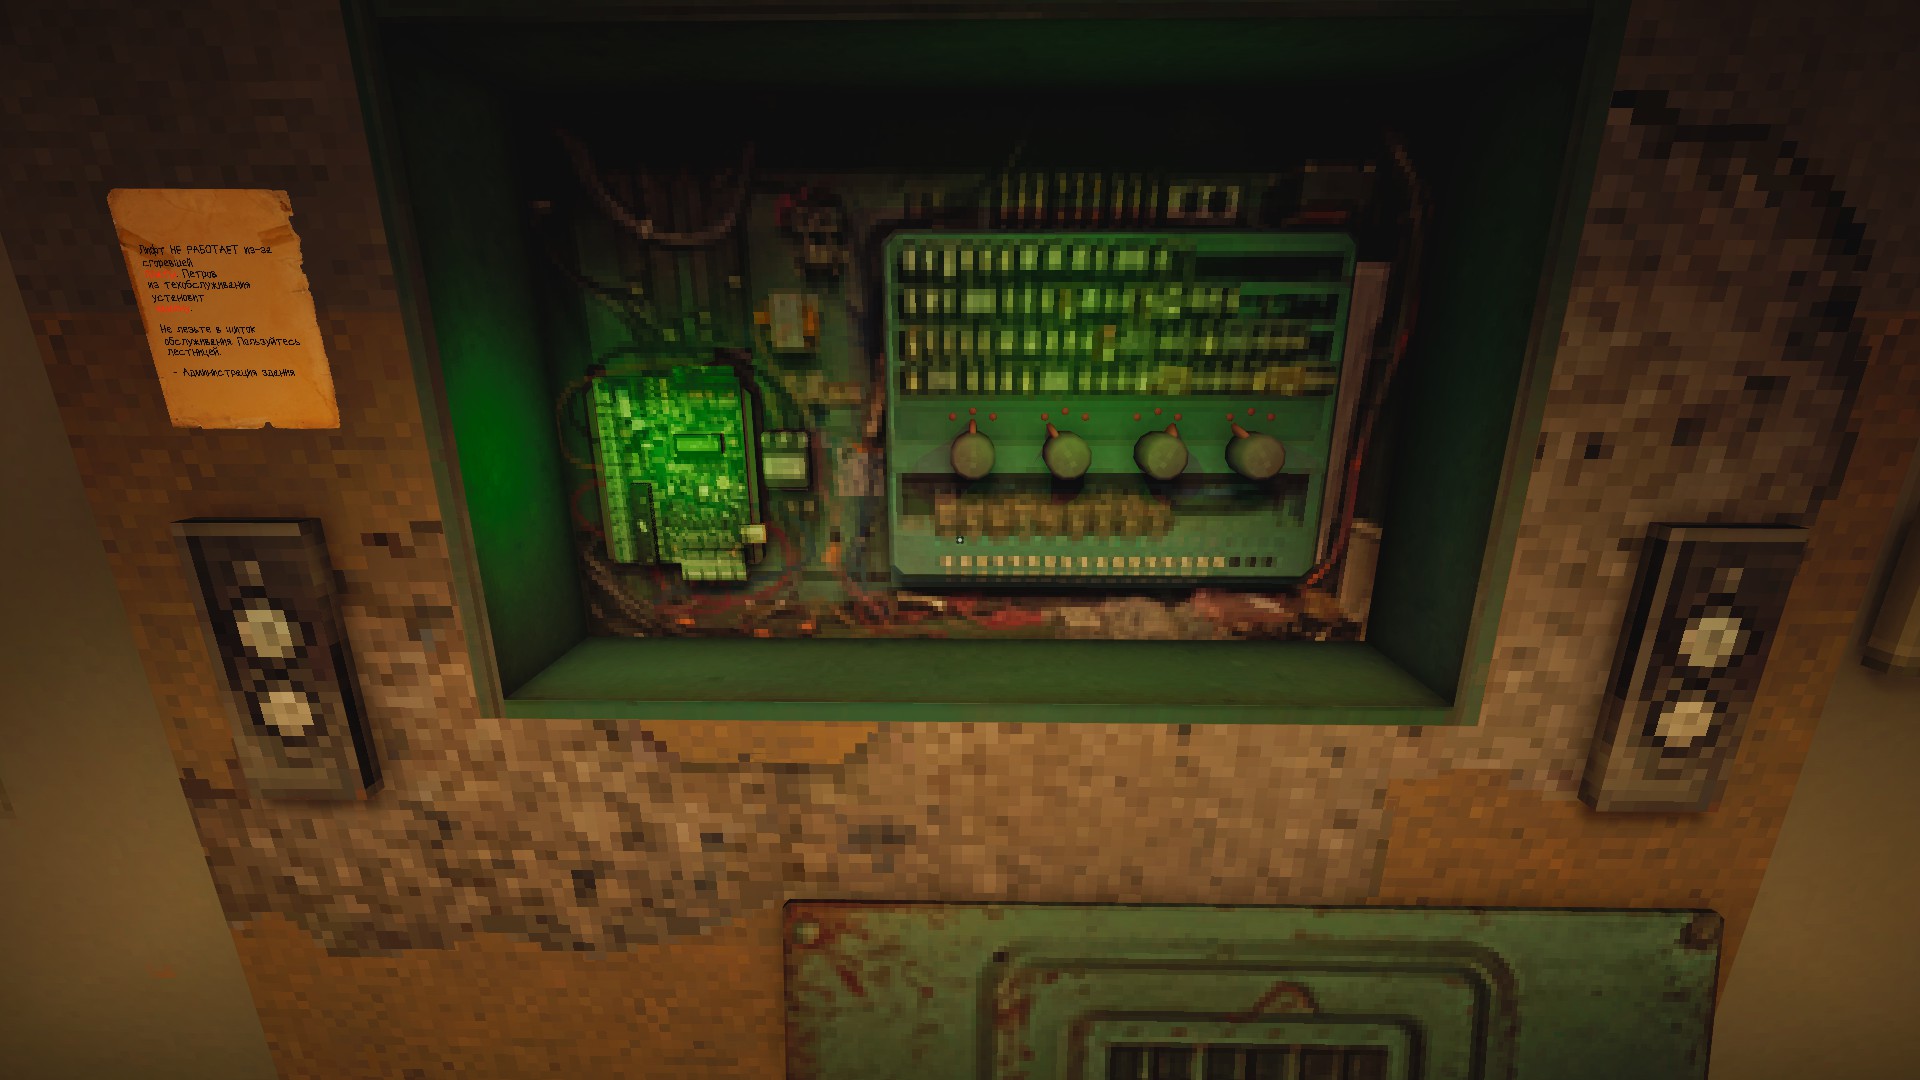
Reach the panel and fit the component
From the supermarket section, continue through the Southern district and railway approach to residential Block A. Find the open electrical cabinet between the elevator doors on the ground floor. If the elevator does not work, start with the cabinet and component search below.
- Search the apartment to the right of the panel area. The older route calls the required item an electrical diagram; Alma describes a board taken from a body. In MasakoTeam's recording at 15:10, a useful room landmark is a striped-shirt body seated against a bookcase, beside blood on a red rug.
- Check for the actual component in your inventory. The recording shows the item name Circuit Board at 17:40. Use that name to distinguish the part from the readable note in the corpse room. The exact room number is not established by these captures.
- Return to the cabinet and fit the board. Compare the left-hand board position with the screenshot above, then adjust the four dials.
Leave the dials at these final positions. The numbers identify positions; they are not a count of button presses:
| Dial, left to right | Community number | Pointer direction |
|---|---|---|
| First | 2 | Centre / up |
| Second | 1 | Left |
| Third | 3 | Right |
| Fourth | 1 | Left |
Check the elevator as the result of the repair. The older recording shows the repaired-elevator confirmation around 18:50, followed by entering the elevator. Try its call and floor controls before looking for a key upstairs. If it still does not respond, recheck the fitted board and all four pointers first.
If another guide tells you to enter 001101, compare the mechanism: that six-switch input belongs to the Police Station camera puzzle. This apartment cabinet has four rotary controls.
A.96: get the connector key
- Take the elevator up through Block A.
- From the upper landing, descend one level by the stairs and turn right.
- Check the right-hand apartments for A.96. Alma's route places the connector key in its kitchen.
- Collect the key before searching optional rooms. This is the key that advances the crossing into Block B.
- Return up the stairs, turn left and use the connector door to enter the neighboring block.
Use the apartment number and the kitchen together to identify the pickup. In the community image, a green key lies on the windowsill immediately left of the Gnom, above the radiator. Aim at the key itself and confirm that you collected it; taking the gun does not replace the key pickup.
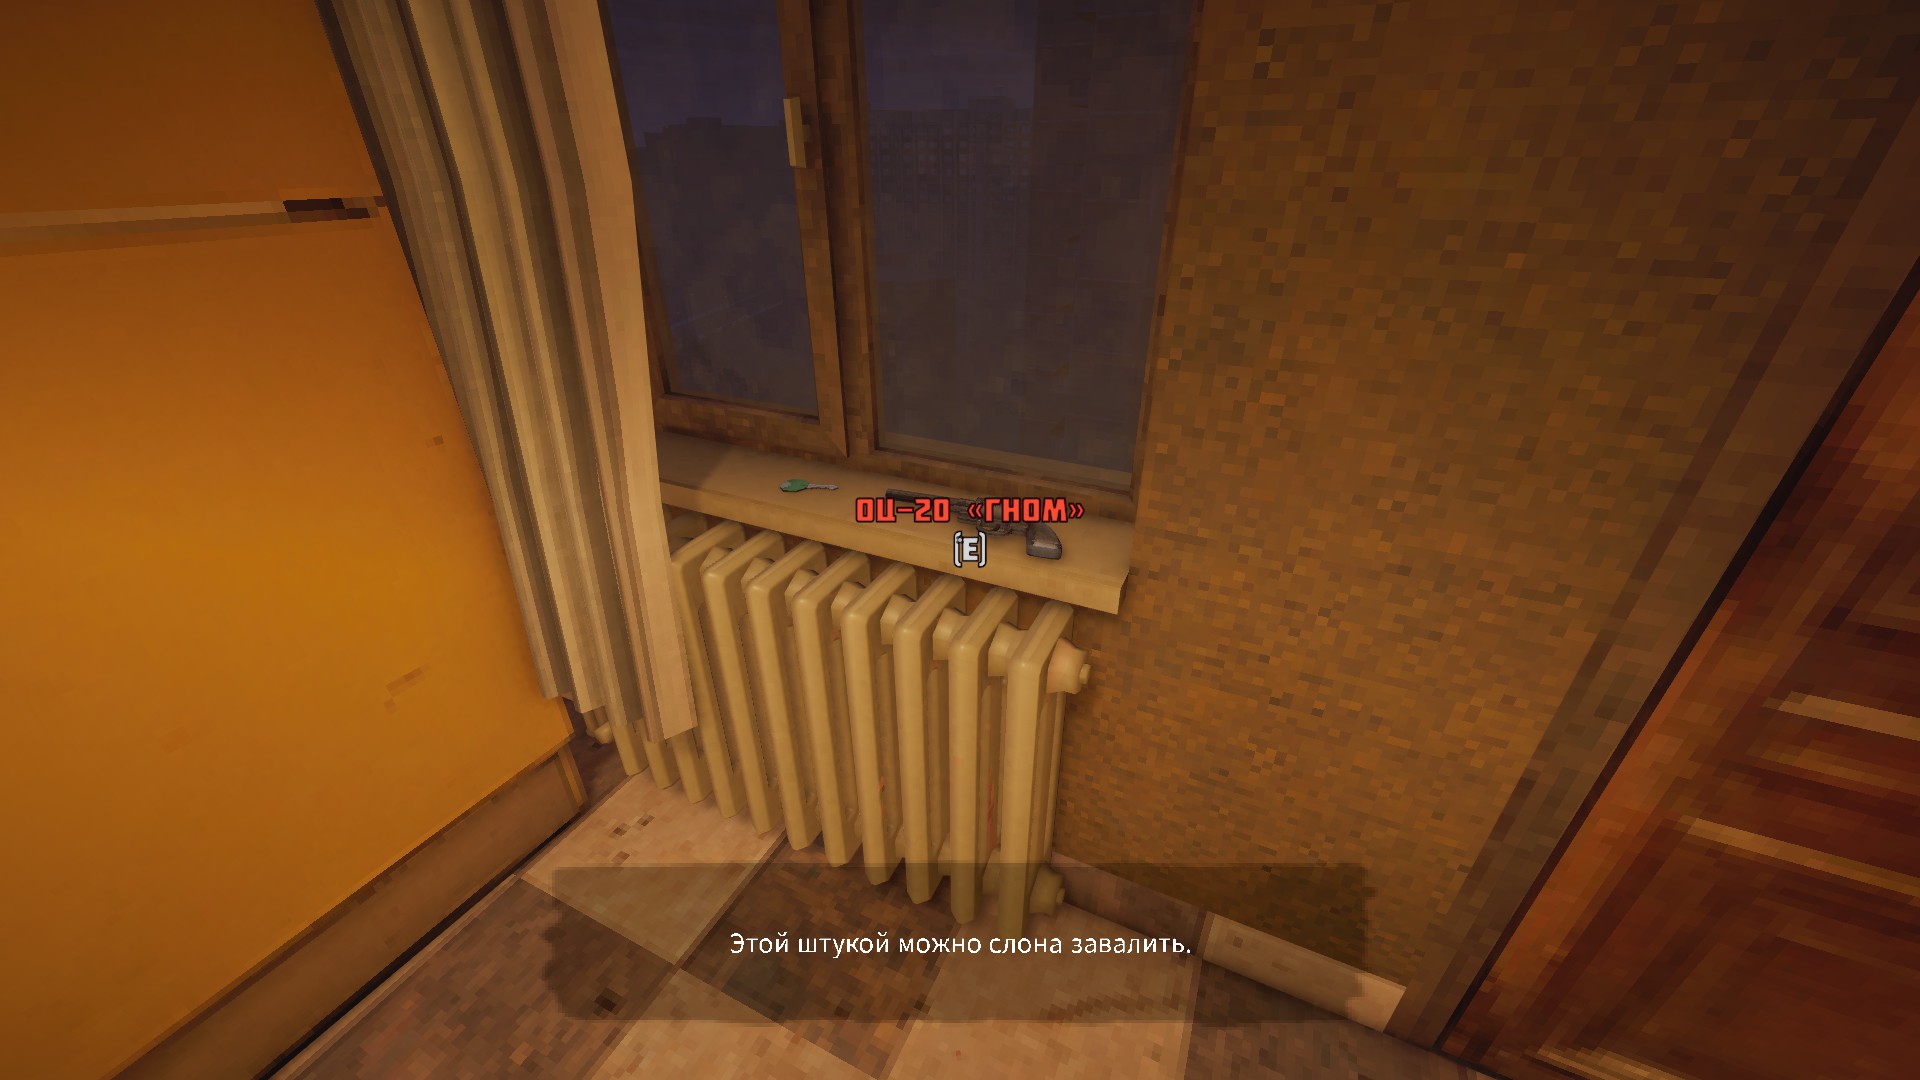
A.99 is a separate optional attachment stop; searching it does not replace the A.96 key objective.
B.95: check the windowsill before leaving
- After opening the connector door, cross into Block B.
- Turn right and go down one floor. Check the apartment on the right.
- Search its windowsill for the key to the later workshop area. Alma also mentions a backpack here; finding a backpack alone does not complete the key objective.
- Check the key in your inventory, then retrace the crossing toward Block A and the factory approach.
Danyuv and Slavvaking call this destination B.95; Alma writes A95 after explicitly entering Block B. Use the block crossing, right turn, one-floor descent and windowsill together to identify the room. A clear door-number capture is still needed to settle the lettering.
- Fit electrical component
- Set dials: 2, 1, 3, 1
- A.96 kitchen: connector key
- Cross to Block B
- B.95 windowsill: route key
- Return toward the factory
A dependency checklist, not a scale map. Check each carried item before leaving its room.
| Where you are stuck | Check this next | Progress to confirm |
|---|---|---|
| Ground-floor panel does nothing | Circuit Board fitted on the left, then four dials at their final settings | Elevator call and floor controls respond |
| You read the corpse-room note but cannot repair the cabinet | Check your inventory for Circuit Board | The component can be fitted to the cabinet |
| Connector door remains locked | A.96 kitchen and the carried connector key | You can cross into Block B |
| Apartment explored, but next route still locked | Destination windowsill in Block B, even if you already took the backpack | The second key is in your inventory |
| At the factory machine | Use the separate Punch Card code 45107 | Collect the finished card before approaching its door |
Continue to the factory and Blowtorch
Return from the apartment blocks toward the factory route. The apartment sequence and the Punch Card are separate interactions: 2131 belongs to the apartment route, 45107 to the factory machine, and 001101 to the later Police Station camera panel.
Before the drop after the Punch Card door, leave space for the Blowtorch and check the barrel in the pickup area. Carry it for the next sealed-door interactions. For the wider tool order, return to the Prasnova walkthrough.
If loading leaves you sideways or a door has no prompt
Install the October 17 update before retrying apartment loading problems: it lists a potential fix for sideways spawning. Prasnova's accidentally enabled quick save/load was also removed. Use the saves the current menu actually offers, check the checkpoint's location before loading and keep an existing earlier checkpoint if one is available. The save guide separates these changes from Save & Quit.
For a missing door prompt, first distinguish the A.96 connector key from the later windowsill key. If the correct item is carried and the prompt still fails, record the room number, objective and build for known-issues troubleshooting.
Sources and route review
Reviewed October 21, 2026 against the three linked Steam guides, their original screenshots, dated frames from MasakoTeam's August 27 recording and the developer's October 17 announcement. The video adds the corpse-room landmark, inventory item name and elevator result; Alma supplies the numeric dial settings and turn sequence. Danyuv and Slavvaking share imagery and closely matching text, so they count as one evidence family. The precise component-room number and conflicting B.95/A95 label remain unresolved. This is a source and image review, without a current-build in-game replay.
Continue exploring
Related guides
Iron Blight Puzzles: Codes, Solutions and Route Help
Solve Iron Blight puzzles with direct, version-checked answers for the Punch Card machine, environmental clues, locked routes, and progression blockers.
Iron Blight Punch Card Code: 45107 and Factory Route
Solve the Iron Blight Punch Card puzzle with code 45107, collect the completed card, open the factory exit and check the next Blowtorch pickup.
Iron Blight Police Station Puzzle: Code 001101
Solve the Iron Blight Police Station camera-switch puzzle with 001101, find the boat key, and check the current patch before retrying a blocked panel.
Iron Blight Wiki: Survival, Puzzle and Route Guide
Use the Iron Blight Wiki to find direct answers for gameplay, routes, puzzles, weapons, key items, inventory, Prasnova locations, downloads, and reviews.